Impeccable Trousers! How to Iron Pants Correctly (With or Without a Crease)

Well-ironed pants make the difference between a sloppy look and a neat, professional one. Whether they are dress pants for the office, casual chinos, or even jeans, removing wrinkles correctly and, if desired, pressing a sharp crease, is essential for a good presentation. However, ironing pants can seem tedious and complicated, especially getting both legs the same and without unwanted marks. But it doesn't have to be! Learning how to iron pants following an orderly method will save you time and guarantee flawless results.
In this comprehensive guide, we'll take you step-by-step through the process of ironing pants, from initial preparation to how to achieve (or avoid) the famous crease, with specific tips for different types of fabric. Get ready to master the art of the iron and show off perfect pants!
Preparation: The Foundation for Successful Ironing
Before turning on the iron, a few minutes of preparation are key:
- Read the Label (Always!): This is the most important step. Check the care label of the pants to know the fabric composition (cotton, linen, polyester, wool, blend...) and, above all, the recommended maximum ironing temperature. This is usually indicated by dots inside the iron symbol:
- 1 dot: Low temperature (delicate synthetics, silk, acetate).
- 2 dots: Medium temperature (wool, polyester, blends).
- 3 dots: High temperature (cotton, linen).
- Crossed-out Iron: Do not iron.
- Empty Pockets: Make sure absolutely nothing is left inside (coins, keys, papers...). Ironing over an object can mark the fabric or damage the iron.
- Iron Inside Out?: It's highly recommended to iron dark pants (black, navy, brown...) and those made of delicate or synthetic fabrics (wool, faux silk, polyester) inside out. This prevents unsightly shine caused by direct contact with the hot iron.
- Prepare Your Equipment:
- Ironing Board: Use a stable board and adjust it to a comfortable height for you.
- Iron: Ensure the iron's soleplate is clean. Fill it with distilled or demineralized water if using steam (tap water can clog it with limescale over time).
- Press Cloth (Optional but Very Useful): Have a clean, thin cotton cloth handy (an old handkerchief, piece of sheet). Use it between the iron and the pants to protect delicate fabrics or prevent shine on dark colors, even when ironing inside out.
- Spray Bottle with Water (Optional): Useful if pants are very dry and wrinkled.
- Damp or Dry?: Ironing pants when they are still slightly damp (fresh from the washer and spin cycle, or after partial air drying) usually makes wrinkle removal much easier. If completely dry, you'll need to use more steam or spray water.
Order Matters: Ironing Step-by-Step
Following a logical order prevents re-wrinkling already ironed areas and ensures a uniform result. Always work from smaller or more complex parts to larger ones:
- 1. The Pockets:
- Turn the inner pockets inside out (both front and back, if applicable).
- Iron them first until smooth.
- Carefully tuck them back into place. Ironing pockets prevents their wrinkles from showing through on the outside of the pants.
- 2. Waistband and Top Section:
- Place the top part of the pants (the waist) over the narrow end of the ironing board.
- Iron the waistband in sections, rotating the pants on the board.
- Carefully iron the fly area, avoiding direct contact with metal zippers or buttons (use the iron's tip around them).
- Iron the hip and seat area. If there are pleats (sewn folds at the waist), iron them following their natural direction. For belt loops, press the iron gently over them without sliding much to avoid distorting them.
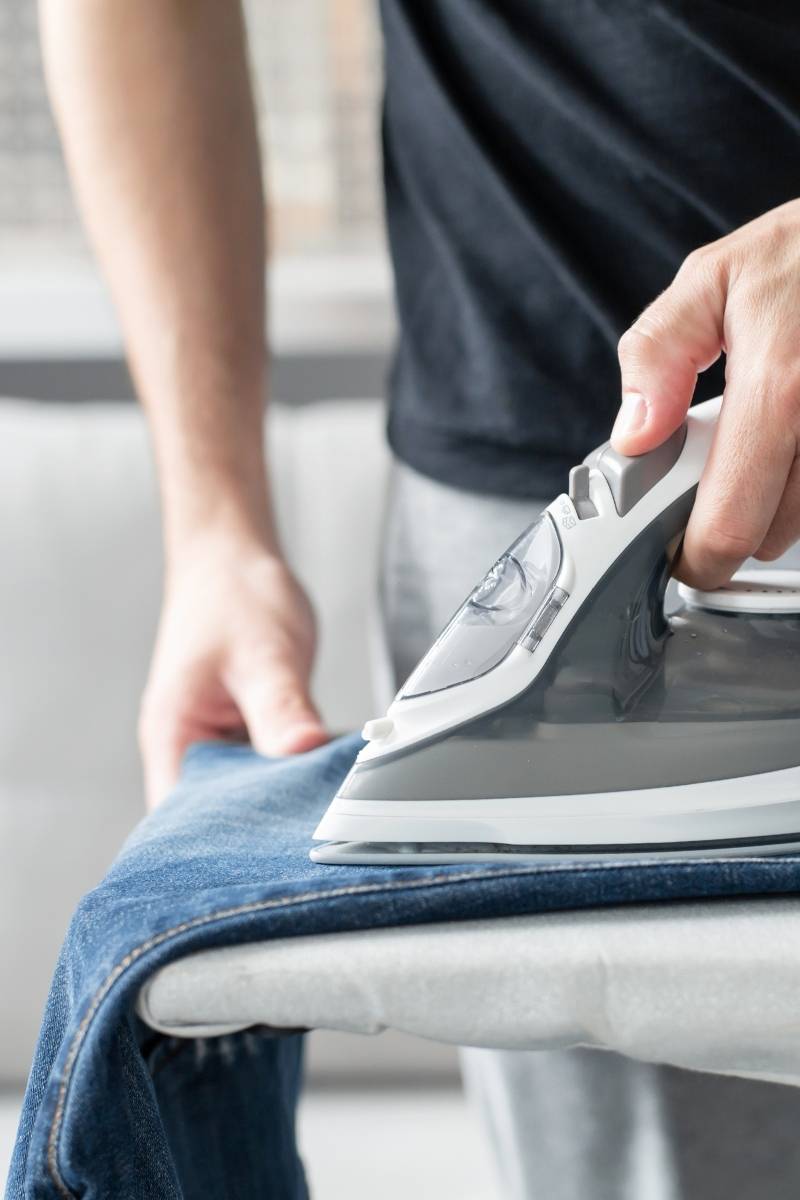
- 3. The Legs (The Main Body): This is the crucial part, especially if you want to press a crease.
- Position One Leg: Lay one leg completely flat on the board. Smooth it well by hand.
- Align the Seams!: This is the MOST IMPORTANT step for correct ironing (with or without a crease). Fold the leg lengthwise onto itself, perfectly matching the inseam with the outseam. Ensure they lie directly on top of each other along the entire leg. Smooth the folded fabric well.
- Iron the Inner Part (First): First, iron the part of the leg underneath when folded. Move the iron from the ankle towards the groin.
- Iron the Outer Part (and Decide on the Crease): Now, with the leg still folded and seams aligned:
- If you DO NOT want a crease: Simply iron the entire visible surface of the leg, avoiding pressing too hard on the folded edges (the front and back).
- If you DO want a crease (the "pant crease"): The folded edges (where the fabric naturally folds when seams are aligned) are your guide. With a hot iron and using steam (if fabric allows), press firmly along the front edge, from the hem up to a few inches below the pocket. Do the same on the back edge. You can help by slightly lifting the top layer of fabric to iron the fold precisely. For dark or delicate fabrics, use the press cloth to prevent shine when setting the crease.
- Iron the Other Side of the Leg: Carefully turn the leg over, maintaining seam alignment, and iron the other side, pressing or not pressing the crease according to your choice.
- Repeat with the Other Leg: Do the exact same process with the second leg, ensuring seam alignment and that the crease (if made) is equally sharp and positioned.
Specific Tips by Pant Type
- Dress Pants / Suit Trousers (with Crease): Meticulously follow the seam alignment step and press the crease firmly with steam. Use a press cloth if dark. These benefit most from professional pressing.
- Chinos / Cotton Pants: Tend to wrinkle significantly. Iron slightly damp and use steam. Generally worn without a crease, so iron the folded legs without emphasizing the edges.
- Jeans: Durable. You can use high heat and steam. Iron inside out to prevent shine and protect color. Usually worn without a crease.
- Linen Pants: Wrinkle heavily. Iron very damp, on high heat, and preferably inside out. Accept that some wrinkles might remain.
- Pleated Pants: Iron the pleats following the direction of the sewn fold from the waistband downwards, pressing gently.
Also, if after washing and drying you notice residues or marks that hinder ironing, consult our tips on how to remove tough stains before applying heat with the iron.
The Final Touch: Hanging and Cooling
Don't undo your work! As soon as you finish ironing:
- Hang Pants Immediately: Use a proper hanger. The best are clamp hangers that grip the waistband (ensure clamps don't mark fabric) or bar hangers where you can carefully fold them along the crease (if they have one) or in half.
- Let Cool Completely: Don't put warm pants directly into the closet or wear them right away. Let them cool on the hanger for at least 15-20 minutes. This helps set the press and makes it last longer.
Frequently Asked Questions about Ironing Pants
What is the correct way to iron pants?
Follow the order: pockets, waistband/top, legs (aligning seams). Use appropriate temperature and hang afterwards.
How to iron wrinkled pants?
Iron slightly damp, use steam, correct temperature for fabric, and follow the section-by-section order.
What is the correct way to iron?
Read label, use board, correct temperature, follow logical order per garment, keep iron moving, hang finally.
How to achieve perfect clothes ironing?
Preparation (clean/damp clothes), correct temp, order, steam, press cloth if needed, hang & cool. And practice!
Ironing pants can stop being a dreaded chore if you follow an orderly method and pay attention to details like temperature and seam alignment. With a little practice, you'll achieve professional results and always look impeccable.

Sebastián R.
More than 10 years at the helm of Lacolada Lavanderia Autoservicio Ponferrada and repairing industrial and domestic machinery in my spare time. You won't find unverified theories from the internet here, just real solutions tested by someone who gets their hands dirty every day.
More Clothing Care Tips
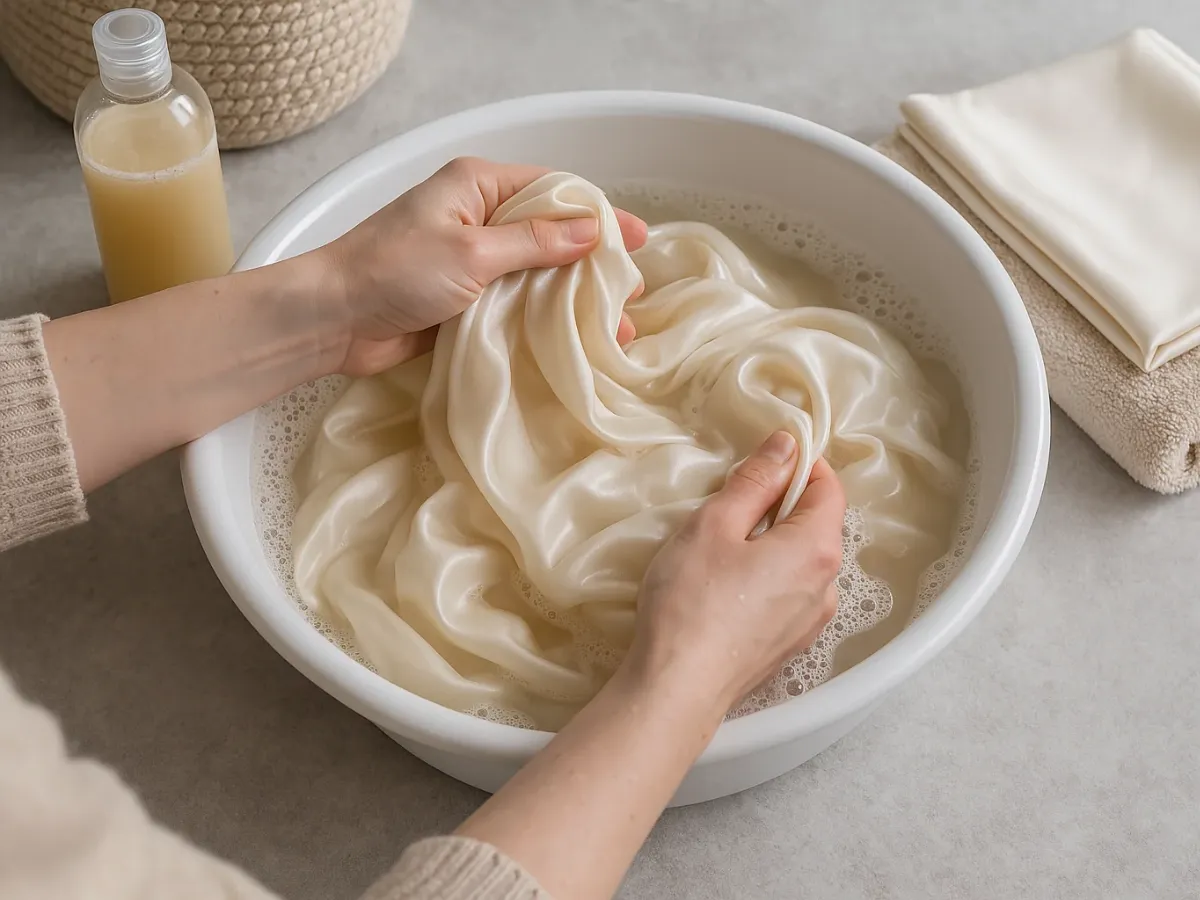
How to Wash Silk Without Ruining It
Essential care for hand or machine washing silk garments.
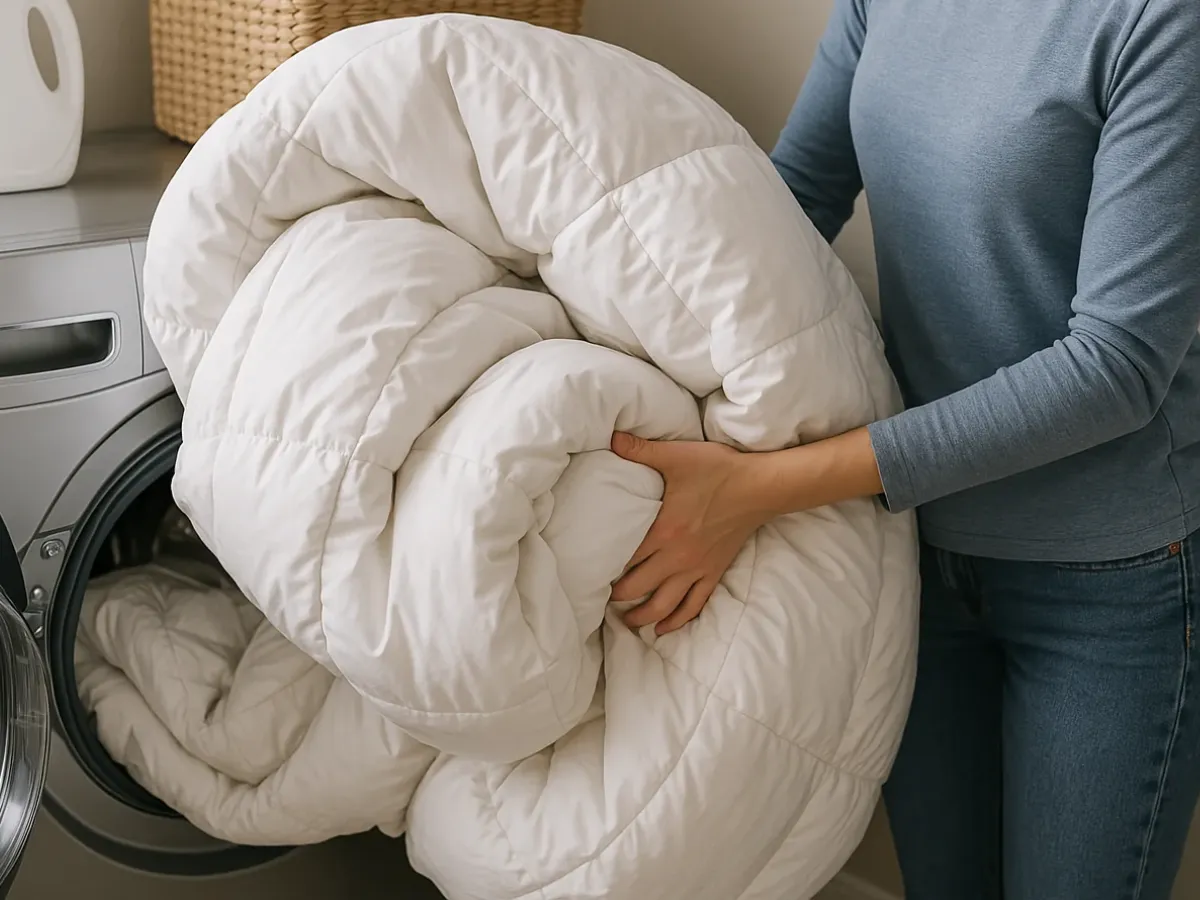
How to Wash Down (Jackets, Comforters) Without Clumping
Maintain the fluffiness and insulation of your down items.
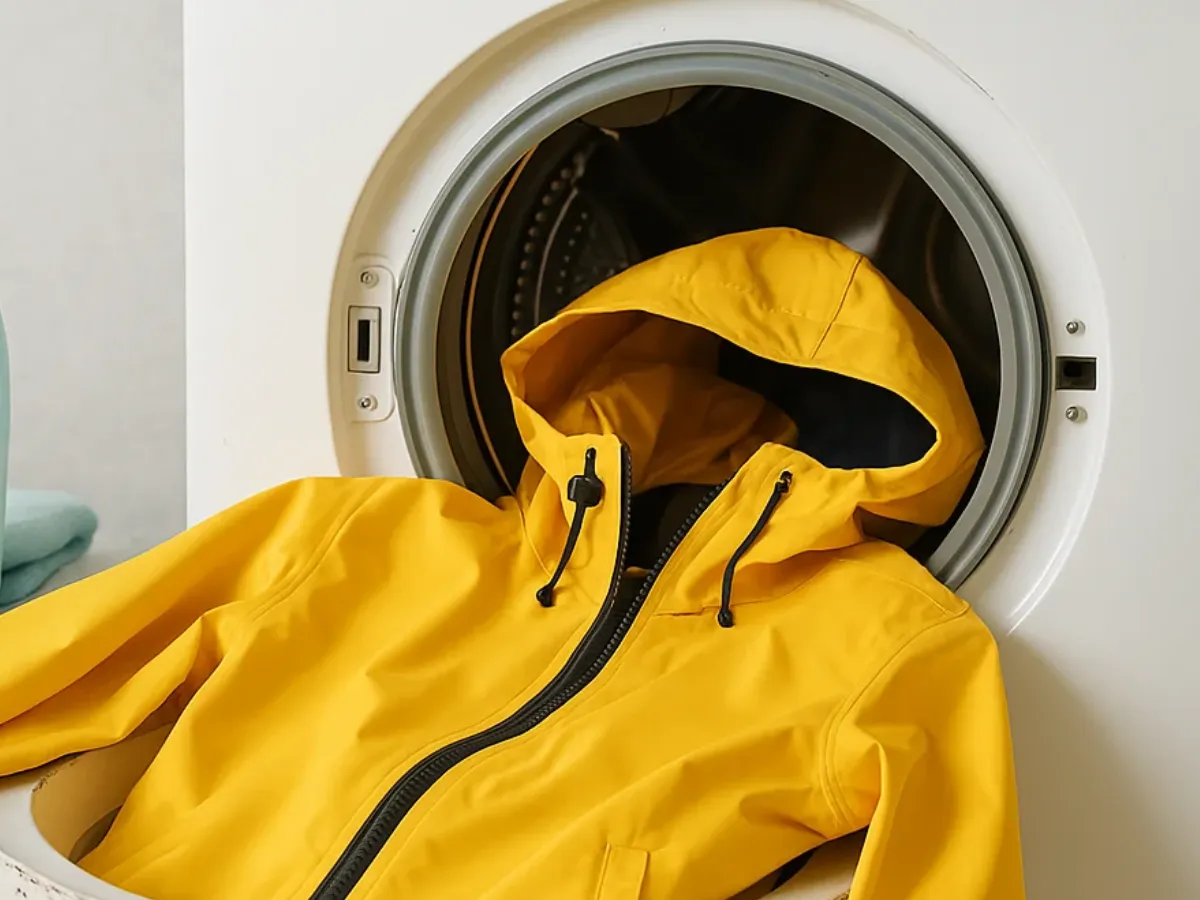
How to Wash Raincoats and Maintain Protection
Preserve the functionality of your technical garments.